Author Topic: Making Patterns: Tips for Beginners and Frequently Asked Questions  (Read 20219 times)

Offline Ausette

  • Watcher
  • ******
  • Posts: 1762
Making Patterns:  Tips for Beginners and Frequently Asked Questions

Lately I’ve been getting a few PMs from aspiring pattern makers asking how I make my recolourable patterns. The truth is, Create-A-Pattern can be a bit counter-intuitive for new users, and sometimes you need to follow certain steps if you want your patterns to turn out OK. That’s why I’m starting a thread for people who’ve played around with CAP but aren’t sure what to do next, a CAP FAQ of sorts. I’m hoping we’ll build up a nice little archive of tips and suggestions here. :)

Now, keep in mind that the methods presented here are probably not the only way to get things done, but they’re the methods that have worked for other people. To learn the really basic stuff, I suggest you read Twinmum’s guide as well as the EA guide (click the question mark button in CAP) and familiarise yourself with the tools a bit first. Alrighty then, onward we go!

Let’s start off with the following:

Offline Ausette

  • Watcher
  • ******
  • Posts: 1762
Re: Making Patterns: Tips for Beginners and Frequently Asked Questions
« Reply #1 on: August 13, 2011, 10:09:47 PM »
Stencils

So, you’ve added some nice black and white stickers to your pattern and recoloured them using the tools in CAP. You go to import the pattern into your game and… rats. If you use stickers that are black, white or grey, they aren’t going to show up in colour in your game. Even if you choose stickers with a bit of colour on them, they sometimes won’t recolour well at all. That’s where stencils come in.


Clicking on the stencil button (just next to the button with the eraser on it) will turn all the stickers on your layer into single-colour silhouettes. It can be annoying if your sticker has some fancy details on it, but if you’re using stickers just for their shape, stencils are a must. Why? Because stencilled stickers recolour perfectly in-game. Start using stencils, you’ll be surprised how well things turn out. :)


Registered members do not see ads on this Forum. Register here.

Offline Ausette

  • Watcher
  • ******
  • Posts: 1762
Re: Making Patterns: Tips for Beginners and Frequently Asked Questions
« Reply #2 on: August 13, 2011, 10:10:07 PM »
Making a Recolourable Background

Most people trying to make their first pattern will change the aptly named “Background Colour” layer and then scatter a bunch of stickers on top of it, like this:


There’s just one problem with that: The background colour is not going to recolour in-game. Don’t worry though: if you want a recolourable background all you have to do is:

1: Select a basic square sticker from the default stickers given to you.

2: Place the sticker on the bottom layer of your pattern and stretch it to cover the whole background (it should be at least 256 x 256 pixels wide).

3: Click the Stencil button to turn it into a stencil.

4: Recolour. Tah-dah! You can’t add extra stickers to your bottom layer this way, but it’s worth it to have a background you can recolour.

Offline Ausette

  • Watcher
  • ******
  • Posts: 1762
Re: Making Patterns: Tips for Beginners and Frequently Asked Questions
« Reply #3 on: August 13, 2011, 10:10:33 PM »
Using Coordinates
Do you want to position your stickers with mathematical precision? You’re in luck, there’s a tool for exactly that! Click on your sticker, and this little tool panel will pop up in your corner:


You have two sets of coordinates, the X-axis and the Y-axis (just like Maths class!). The values in the boxes tell you how far, in pixels, the sticker is from the top-left corner. Changing a sticker’s X value up or down will move it right or left, and changing the Y value up or down will move it down or up. For example: The CAP canvas is 256 pixels wide, so if you type in “128,128”, your sticker will be in the middle. Here’s a handy chart (not totally to scale):


Offline Ausette

  • Watcher
  • ******
  • Posts: 1762
Re: Making Patterns: Tips for Beginners and Frequently Asked Questions
« Reply #4 on: August 13, 2011, 10:11:22 PM »
No Photoshop? No Problem!

Photoshop and other graphics programs are no doubt very useful (and I’m sure people would welcome a short guide about using them, hint hint), but not all of us can get our hands on them. Thankfully, you’ve got a few options on your hands.
 
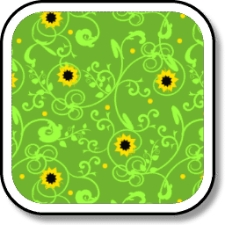
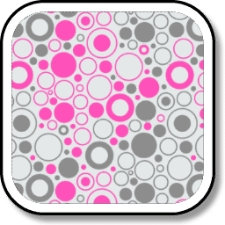
CAP Clip Art: If you don’t want to download any programs, you can actually make some pretty cool patterns using only the stickers provided. My first seven patterns (including Bubbles, Soap Suds and Vine Climb) and a recent T-shirt print were all made without other graphics programs. All you need to do is use stencils, keep an eye on the sticker limit (50 stickers per layer), and perhaps use coordinates, and you can make all sorts of great designs!

 Sticker Transparency using GIMP 2: As you may have noticed, if you want to make your own non-rectangular stickers, you’ll need a program that can make the backgrounds transparent. After some correspondence with the most awesome Gheez a while ago, we managed to track down a free downloadable program called GIMP 2. It can do all sorts of things with graphics, but to be frank I just use Paint for most of my stickers until I go to make the backgrounds transparent.  For those who want to use GIMP, here’s the steps to add transparency to a sticker (again, thank you Gheez!):

1: Open GIMP and Copy/Paste your sticker from Paint
2: Use the Select tools from the tool bar on the left to select the regions you don’t want to be transparent. Shift-click to select more than one region. I like to use the “Select Regions by Colour” tool for this. It’s also easier if you zoom in. :)
3: Now that everything’s selected, click on the Layer menu and select Transparency -->Select Alpha Layer.
4: Select Edit --> Clear (or just tap Delete) to make the image transparent.
5: Save it as a .png file. Make sure the “save colour values from transparent pixels” option is checked. There, now your sticker is ready to import to CAP!

Using Microsoft Powerpoint to remove pixelation
Say you’ve got a black and white image that’s a bit pixel-y around the edges. Like this scan:
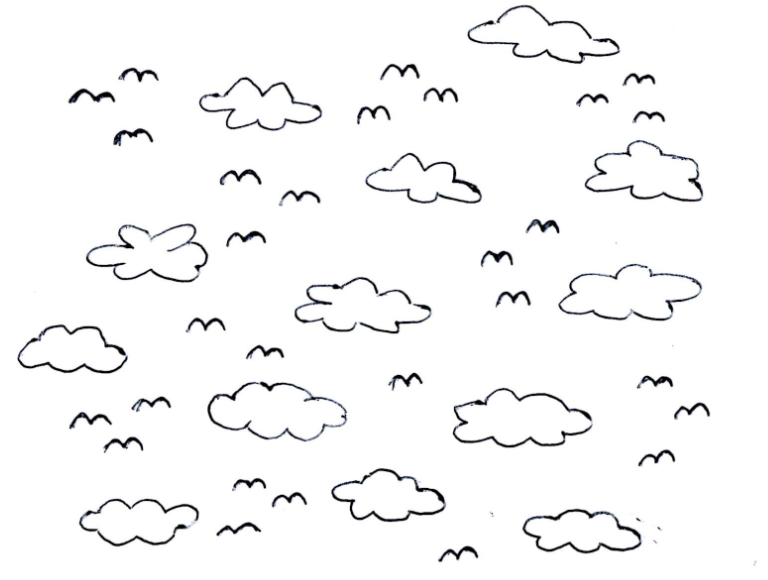


Obviously, the “Select Regions By Colour” tool mentioned above isn’t going to pick up the hundred shades of grey around the edges. That’s why we need a tool to convert it to straight black and white. Luckily for us, Microsoft Powerpoint can do exactly that using these steps:

1: Copy and Paste your image into Microsoft Powerpoint . Do not stretch or resize it, or it’ll come out pixelated in the end anyway.
2: Select your image and click on the little “Picture Tools” tab that pops up. This’ll open up a whole new bunch of options.
3: Click “Colour”. A little drop down menu of options you can pick will show up. You want the two purely black and white options, seen here:
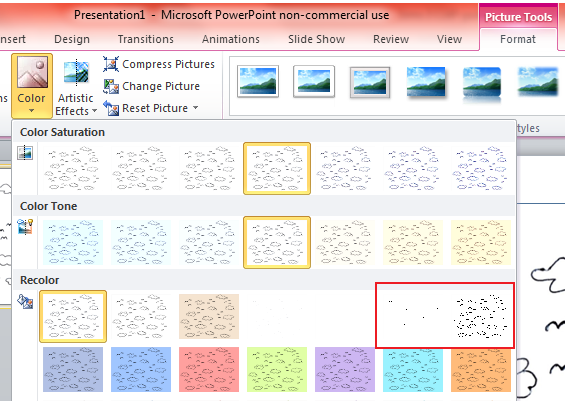


One is darker than the other, so pick the one that works for you.
4: Now that your image is in black and white, copy/paste it back into Paint, clean up the stray pixels a little, and recolour it however you want. Tah-Dah! Now all you need to do is follow the instructions above to make the image transparent. Well done!

Offline Ausette

  • Watcher
  • ******
  • Posts: 1762
Re: Making Patterns: Tips for Beginners and Frequently Asked Questions
« Reply #5 on: August 13, 2011, 10:12:48 PM »
Whew, that should be enough to start us off with! Who else here has some tips and tricks for using CAP? I'm sure we'd all love to hear them!

Offline Gogowars329

  • Watcher
  • ******
  • Posts: 3165
Re: Making Patterns: Tips for Beginners and Frequently Asked Questions
« Reply #6 on: August 14, 2011, 05:38:46 AM »
Thanks for doing this Ausette! At what axis should you have the sticker for a t-shirt?
Gogowars Inc - The place to find all of my wonderful Sims 3 creations


Registered members do not see ads on this Forum. Register here.

Offline Ausette

  • Watcher
  • ******
  • Posts: 1762
Re: Making Patterns: Tips for Beginners and Frequently Asked Questions
« Reply #7 on: August 14, 2011, 06:17:19 AM »
Thanks for doing this Ausette! At what axis should you have the sticker for a t-shirt?

You're welcome :). The X-value is usually 128 (direct middle), but the Y-value depends on the size and shape of your sticker and the position you want on the shirt. As a rule of thumb, keep the top of the sticker just below the half-way mark of the canvas, and the bottom of the sticker above the bottom of the canvas. That should stop it from showing up on the sleeves of the male shirt. Here's some examples:

Batman Tee: stickers at (128, 160)


Cotton Couple Tee: sticker at (128, 200)


Offline Seabody

  • Global Moderator
  • Watcher
  • ******
  • Posts: 5071
Re: Making Patterns: Tips for Beginners and Frequently Asked Questions
« Reply #8 on: August 22, 2011, 12:00:12 AM »
Two questions:

1. If I just paste an image in, will it be recolourable?
2. How do you take screenshots in CAP?

Offline Ausette

  • Watcher
  • ******
  • Posts: 1762
Re: Making Patterns: Tips for Beginners and Frequently Asked Questions
« Reply #9 on: August 22, 2011, 02:19:49 AM »
Two questions:

1. If I just paste an image in, will it be recolourable?
2. How do you take screenshots in CAP?

1. If the image has some colour in it (as in, it's not completely black and white), you'll be able to change the colour slightly in-game. It just won't be fully recolourable. 

2. Easy. If you look at the top row of your keyboard, you should see a button that says "PrtSc" (for "Print Screen"). Just hit that button, and it'll take a screenshot that you can paste into Paint.  :)

Offline Seabody

  • Global Moderator
  • Watcher
  • ******
  • Posts: 5071
Re: Making Patterns: Tips for Beginners and Frequently Asked Questions
« Reply #10 on: August 22, 2011, 02:32:58 AM »
So, this is my first ever pattern (I don't have a screenshot of the whole thing, only the image I used:


So it would be non-recolourable?

Offline Ausette

  • Watcher
  • ******
  • Posts: 1762
Re: Making Patterns: Tips for Beginners and Frequently Asked Questions
« Reply #11 on: August 22, 2011, 02:48:19 AM »
Yeah, I don't think it would recolour, although you might be able to change the rainbow bits a little. It doesn't look like the kind of pattern you'd want to recolour though, so that's fine. :)

Offline Schipperke

  • CAS Contest Coordinator
  • Global Moderator
  • Watcher
  • ******
  • Posts: 5241
Re: Making Patterns: Tips for Beginners and Frequently Asked Questions
« Reply #12 on: August 22, 2011, 07:41:19 AM »
Thank you so much for doing this, Ausette!  I'm a big admirer of the patterns created by you and our other talented designers, but I've never had the nerve to try making a pattern myself.  Your instructions may be just what I needed to get me started.   :)
 
Designed by Swirl~Girl, THBL Logo by Danielle Haydis                            CAS Contest Logo designed by Samoht04

Please read The Forum Rules.

Links to My Stories                 CAS Contests

Offline Ausette

  • Watcher
  • ******
  • Posts: 1762
Re: Making Patterns: Tips for Beginners and Frequently Asked Questions
« Reply #13 on: August 22, 2011, 08:09:19 AM »
Thank you so much for doing this, Ausette!  I'm a big admirer of the patterns created by you and our other talented designers, but I've never had the nerve to try making a pattern myself.  Your instructions may be just what I needed to get me started.   :)

Yay! Thanks Schip, that's why I started the thread up in the first place. I'd recommend reading Twinmum's guide and the tutorial provided by EA, then dabbling with the premade stickers for a while. Good luck!  ;D

Offline kiko94

  • Immortal
  • *****
  • Posts: 765
  • you pronounce it *keko* not *kIko*
Re: Making Patterns: Tips for Beginners and Frequently Asked Questions
« Reply #14 on: August 22, 2011, 08:35:00 AM »
Great tut Ausette ! I have bookmarted so I will check it later when I start using CAP, now I'm focusing on building, I remember you posting a link to a tutorial on how to match colors and patterns from the official website, do you still have that link? I need to refresh my memory :P
My Blog For Sims 3 Buildings, visit for exclusive content -07/11 update : New Houses and community lots, don't miss them !!

-The Awkward moment whe you are viewing who's online, and you find somone looking at your profile...